Cake Tutorial by Mark Desgroseilliers of Morsels by Mark
One of my guilty pleasures (in all reality it is cake research), is watching Project Runway with my wife, Jaimie. It is an inspirational show for both of us in that she runs an online shop with her sister where they sell doll clothes for these rare Japanese dolls, and I take a lot of inspiration for my designs from fashion. It is great that we get an hour each week to watch a show where both of our worlds collide. One of my favorite fashion houses is Marchesa. There is just something that screams sophistication in their designs. I was recently going through a folder on my computer of images from the runway, and I came across this picture of Marchesa founder Georgina Chapman wearing one of their dresses on the Project Runway Allstars finale. Thanks to my arsenal of molds from Marvelous Molds, I knew I had the right tools to translate it into a cake design. To do this project, you will require:
Tools and Supplies:
- 6 inch & 10 inch (each 4 inches tall) cake covered in white fondant
- 8 inch (4 inches tall) cake covered in gray fondant
- 12 inch cake drum
- 6 inch (2 inches tall) Styrofoam dummy (or two 1 inch high dummies glued together) covered in gray fondant
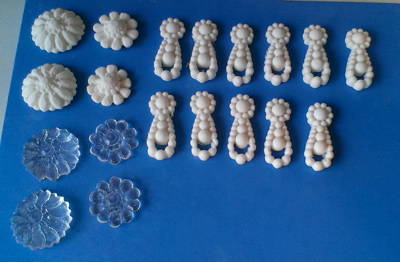
- Classic Pearl Border Mold
- Glimmer Brooch Mold
- Classic Pearl Drop Mold
- Classic Pearl Swag Mold
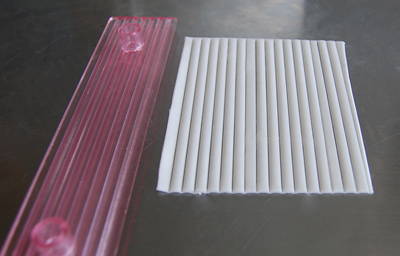
- Scalloped Lattice Silicone Onlay®
- White fondant
- White gum paste
- White 50/50 (fondant/gumpaste mixed in equal parts)
- Coarse sanding sugar
- Silver Sterling Pearl Dust
- Super Pearl Sterling Pearl Dust
- Silver highlighter
- Clear alcohol
- Wafer paper
- 24g white wire
- Jem fringe cutter
- Edible black marker
- Sugar lace
- Matte sugar pearls
- Royal icing
- Melted white chocolate

Instructions
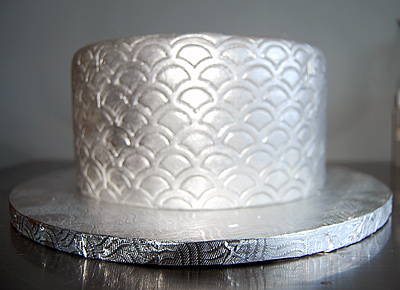
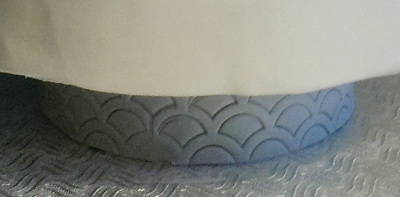
1. Cover the Styrofoam dummy and 8 inch cake in gray fondant. While fondant is still fresh, use Scalloped Lattice Silicone Onlay® to emboss a pattern on the fondant. That’s what’s great about the Marvelous Molds® line of products – they are multi-purpose!

2. Make a paint the consistency of coffee cream with alcohol and silver highlighter. Paint it on the gray tiers and allow to dry.
3. Cast a bunch of Classic Pearl Drops using white gum paste. Also, cast a couple of brooches in each size using the Glimmer Brooch mold and allow these to dry. (You’ll see I cast a few extras and tried some in isomalt. Feel free to do the same and give yourself some artistic freedom.
4. Cover your board with sanding sugar and glue on separator tier to give your cake the illusion it is floating.
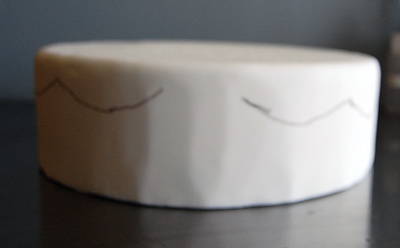
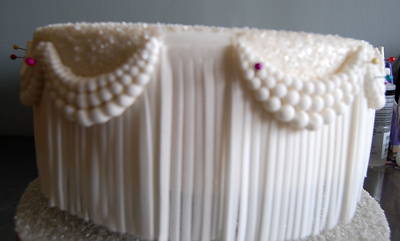
5. Cast a Classic Pearl Swag and, using an edible marker, trace out where the tops of your swags will sit. (Leave a gap in front of cake for brooch mold).
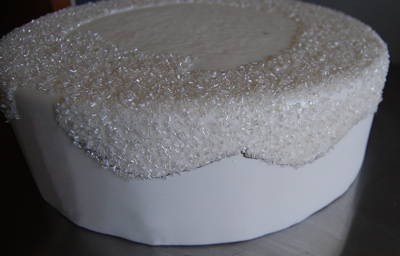
6. Brush area above sketched line with piping gel and cover with sanding sugar. Place on top of separator tier and secure with skewers.
7. Use a pasta attachment to roll your 50/50 to a medium thinness. (I took it to a number 4 on my Kitchen-aid roller). Measure out squares of paste as wide as the Pearl Swag Mold and about 4 inches long. Use the Jem strip cutter to turn the paste into squares of fringe.
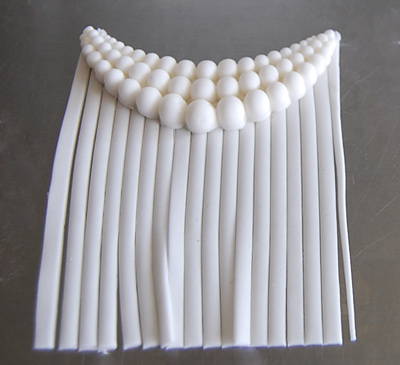
8. Mold a Classic Pearl Swag, attach it to the fringe and trim as necessary. Turn over and brush with piping gel. Attach to cake following traced guidelines and secure with pins to dry. When dry, remove pins and dust swags with super pearl. Add additional fringe (minus swag) to fill in space in front of tier where a brooch will be added.

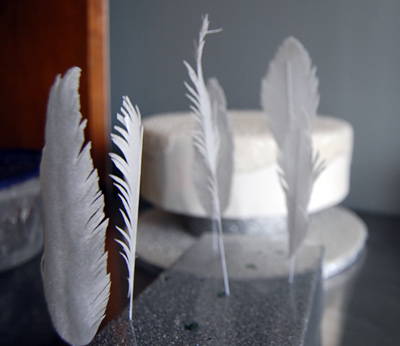
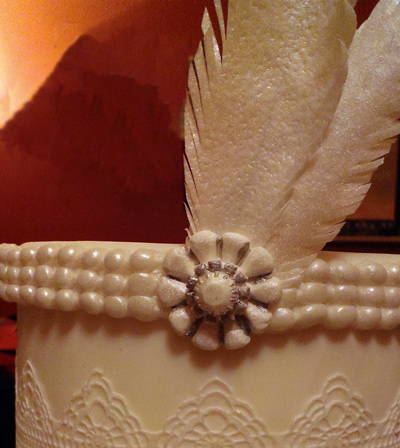
9. Make wafer paper feathers by cutting feather shapes from wafer paper, using small scissors make small snips along edge Apply piping gel lightly to floral wire and attach to feathers. Allow to dry at least 1 hour; dust with super pearl and pass gently through steam of a kettle to give feathers some movement.
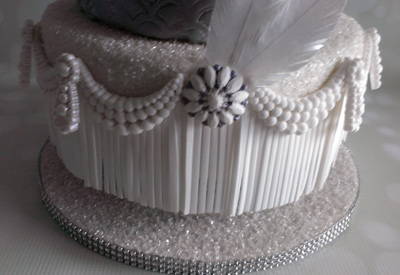
10. Apply Super pearl to pearl drops and apply using melted white chocolate to each join of the pearl swags. Use Super Pearl and Silver Pearl to paint the brooches, as desired. Attach feathers and brooch to gap in front of tier with white chocolate.
11. Stack remaining cakes and secure with skewers and central dowel.
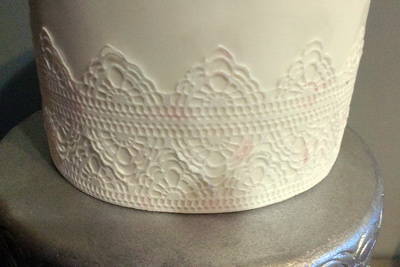
12. Make sugar lace following manufacturer’s instructions and apply to bottom of top tier.
13. Using white fondant, cast some Classic Pearl Border molds, dust with super pearl and attach to top of top tier. Leave a space for a brooch (I like to use one of the extra brooches to impress down on the fondant so it looks seamless).
14. Using the same techniques as step 10, apply 2 feathers and a smaller brooch to top tier.
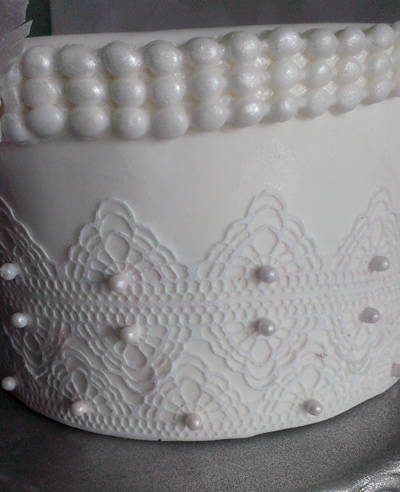
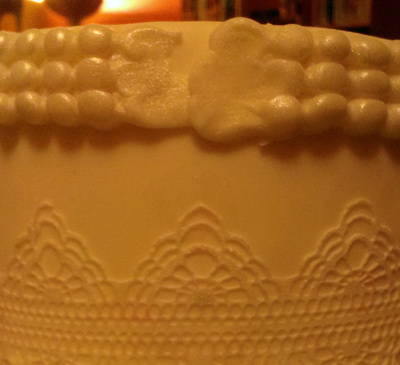
15. Place some matte sugar pearls in a container with super pearl and a couple drops of alcohol. Empty onto paper towel and allow to dry. Using royal icing, apply sugar pearls to accentuate the lace.
And there you have it – a high fashion cake perfect for a wedding, bridal shower or even a special birthday! I’d really like to see what you do with this tutorial. Be sure to share your creations through Marvelous Molds pages on Facebook, Twitter and Pinterest!

This Runway Ready cake tutorial was created by Mark Desgroseilliers from Morsels by Mark. Mark is an award-winning Montreal based cake designer who is the administrator for the local chapter of the Canadian Cake Decorator’s Guild. He loves sharing his passion for sugar and teaches internationally. Visit him online at: http://morselsbymark.weebly.com/